
About the Recipe
After months of testing, tweaking, and tasting, I'm thrilled to finally share this pumpkin spiced sourdough recipe that has become my autumn obsession. What started as a seasonal experiment in my kitchen has evolved into something truly special – so special, in fact, that it was one of the most popular items at my very first farmer's market!
I won't lie to you: this bread demands patience and practice. The timing is crucial, the technique takes some getting used to, and you'll likely need a few attempts to nail the perfect balance of spice, sweetness, and that signature sourdough tang. But trust me when I say every minute spent is absolutely worth it when you pull that golden, aromatic loaf from your oven.
This recipe represents everything I love about seasonal baking – the way autumn flavors can transform a classic technique, the satisfaction of mastering something challenging, and the joy of sharing something made with your own hands. Whether you're a sourdough veteran or ready to tackle your first flavored loaf, this pumpkin spiced beauty will reward your efforts with every slice.
Ingredients
200 grams sourdough starter (See notes)
280 grams canned pumpkin
500 grams warm water
100 grams brown sugar
10 grams salt
1000 grams bread flour
2 - 4 tsp pumpkin pie spice
Instructions
Use a kitchen scale to accurately measure your ingredients. Reset the scale to 0 grams after each addition for precise measurements.
Prepare the dough. Combine the starter, pumpkin, brown sugar, and water in a bowl. Add the bread flour and mix until the dough becomes shaggy. Sprinkle salt over it, then use your damp fingers to incorporate the salt into the dough. With wet hands, continue mixing by hand until all the ingredients are well combined and the dough takes on a light orange hue. Cover with plastic wrap or a plastic bowl cover and allow it to rest for 30 minutes.

Stretch & Folds. Once the dough has rested, execute four 'stretch & folds.' Wet your hands, lift the dough from underneath, and fold it over onto itself. Rotate the bowl a quarter turn and repeat the action. Complete this sequence four times. Cover the dough and let it rest for another 30 minutes. Repeat this process every 30 minutes for three more cycles.
Rest. Following the final 'stretch & fold', cover the dough once more and allow it to rest on the counter for 2 to 2 1/2 hours. You’ll know it’s ready when the dough has increased in size by about 40% and jiggles when you shake the bowl. There should be some bubbles scattered on the top and sides. If this hasn't occurred after 2 1/2 hours, continue to let it rest, checking every half hour. Temperatures below 78 degrees may slow the rising process.
Divide, Layer & Rest on Bench. On a clean countertop, divide the dough into two equal portions (a scale can help with precision if desired). Stretch each piece as thinly as possible without tearing it. Evenly sprinkle half of the pumpkin pie spice over each piece. Use a bench knife or scraper to shape the dough into a ball. Allow it to rest on the countertop for 30 minutes.
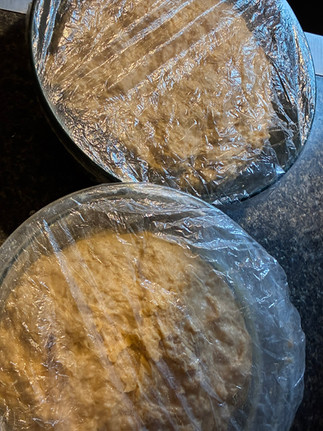
Shaping. Prepare bowls or bannetons by lining them with a kitchen towel or bowl cover and dusting them with flour. Sprinkle a bit of flour on top of each dough ball. Using cupped hands, gently pull the dough sideways in a circular motion to increase its tension. Rotate 90 degrees and repeat the process a few times. Gather the dough, or use a bench knife to lift it, then place it rounded side down into the bowl or banneton.


Cold Fermentation. Cover the doughs with a teal towel/shower cap/plastic wrap. Refrigerate for up to 20 hours. While you can alternatively let the dough rise on the countertop for 2-3 hours, I highly recommend the cold rise.
Preheat the Oven & Score the Dough. Place the Dutch ovens with their lids in the oven and preheat to 450 degrees. Once preheated, remove the dough from the refrigerator. Lay a piece of parchment paper (or your silicone baking sling) over the dough. Flip the dough onto the parchment paper on your countertop. Use a sharp knife or bread lame (scoring razor) to make a cut about 1/2 to 1 inch deep across the bread. You can opt for a single score or a cross pattern, and as you gain experience, you can create more intricate designs!
Bake. Carefully use hot pads to remove the cast iron pots and take off the lid. Place the bread (on the parchment paper) into the Dutch oven. Gently place a few ice cubes on the sides between the parchment and the pot's side (avoid placing ice near the dough). Put the lid back on the pot and, using hot pads (remember, it's hot!), return the Dutch oven to the oven for 30 minutes with the lid on. After 30 minutes, take off the lid and continue baking for 15-20 minutes until the top is browned and the internal temperature reaches 210 degrees.
Cool. Take the loaves out of the pots right away and set them on wire racks to cool. Allow the bread to cool fully before slicing. Enjoy!
Notes
Sourdough starter - Baking sourdough means you need to have active starter. So here is an easy sourdough starter recipe that you will need to get going about a week before you make this bread:
What you need to get started:
Glass jar with a lid (about 20 ounces)
Wooden or silicone spatula
Kitchen scale
This is the 7 day process:
Day 1: Mix. Combine 100 grams flour with 100 grams water in a glass jar. Stir well, scrape down sides, cover, come back in 24 hours.
Day 2: Check. Stir once or twice - you might see some bubbles or not - that's OK. Cover, come back in 24 hours.
Day 3: Feed. Discard half the mix. Add 100 g flour and 100 g water again. Stir. Cover.
Day 4 - 6: Repeat Feeding. Discard half each day and feed with equal parts flour & water. Bubbles should increase and it may begin to rise and fall (that's good!)
Day 6-7: Ready! When it doubles in size within 4-6 hours of feeding and smells pleasantly tangy, it's active and ready for baking.
Note: This could take a few more days depending on things like temperature, humidity, etc. Be patient!
Pumpkin - Make sure to use pumpkin puree instead of pumpkin pie filling! This is crucial for maintaining the right consistency and preventing your dough from becoming too wet.
Add-ins - If you want, you can add in some chopped pecans or chocolate chips during the second stretch and fold. I like it as is, but you can try what you like!
